One of the projects for a course I took fall semester was a solar tracker. The course was based around biomimetic smart surfaces so this solar tracker was an attempt to emulate the human eye. The biomimicry aspect of this project comes from how the solar tracker receives the signal to move. Similar to an eye, the light comes through a pinhole and contacts the sensor array (5 photoresistors). The light intensity is then read as a number and the device responds by moving towards it.
The device consists of a sphere (the eye) fixed at two points to a turntable so it can rotate freely. An arc of pegs ( which was coined 'the mohawk') is attached to the bottom of the sphere and meshes with a gear (powered by a servo) that rotates the eye. The sphere was made by routing a MDF hemisphere and vacuum forming two pieces. The mohawk and the base of the tracker were laser cut from acrylic.
routing the mold:

sphere with mohawk partially attached:

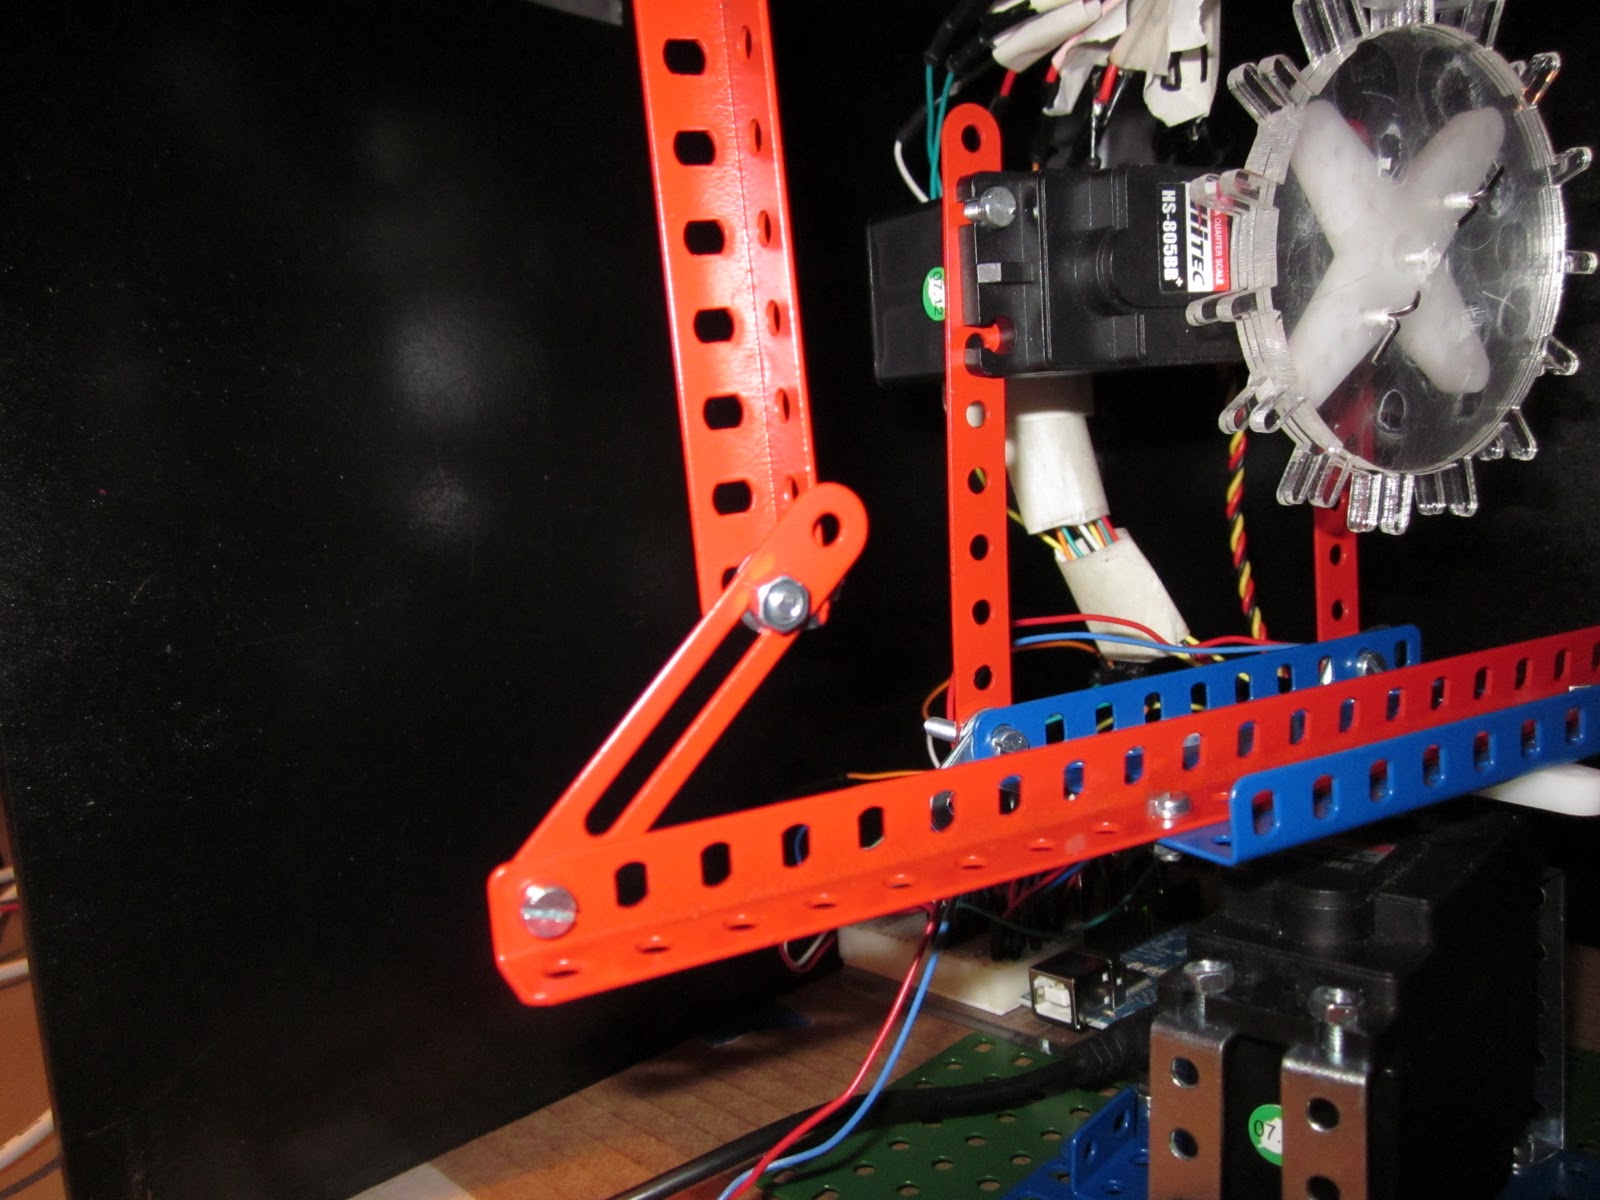
The gear/mohawk mechanism is then attached to another servo that allows the whole eye to rotate on the xy plane by moving the turntable. The image below is a photograph of one of the joints connecting the turntable and the xy plane servo and the servo which contacts the mohawk.


The device consists of a sphere (the eye) fixed at two points to a turntable so it can rotate freely. An arc of pegs ( which was coined 'the mohawk') is attached to the bottom of the sphere and meshes with a gear (powered by a servo) that rotates the eye. The sphere was made by routing a MDF hemisphere and vacuum forming two pieces. The mohawk and the base of the tracker were laser cut from acrylic.
routing the mold:

sphere with mohawk partially attached:

The gear/mohawk mechanism is then attached to another servo that allows the whole eye to rotate on the xy plane by moving the turntable. The image below is a photograph of one of the joints connecting the turntable and the xy plane servo and the servo which contacts the mohawk.
VIDEO GOES HERE
This is an image of our fully functional two-axis solar tracking device. When the pin hole has oriented with a light source, the green led indicator light comes on and is visible through the front of the acrylic case.

This is the code used for operating the servos to track a light source:
#include <Servo.h>
Servo zyplane; //servo attached to the base servo rotates on the zy plane (around x axis)
Servo xyplane;
int pos = 90;
int pos2 = 90;
//PhotoResistors (these are all analog pins)
int photo1 = 0;
int photo2 = 1;
int photo3 = 2;
int photo4 = 3;
int photo5 = 4;
//alignment indicator LED (this is a digital PWM pin)
int ledPin = 5;
void setup()
{
pinMode(ledPin, OUTPUT); //sets the led pin to output
pinMode(photo1, INPUT);
pinMode(photo2, INPUT);
pinMode(photo3, INPUT);
pinMode(photo4, INPUT);
pinMode(photo5, INPUT);
zyplane.attach(10);// attach the pin 10 servo to servo object
xyplane.attach(9);
Serial.begin(9600); // use the serial port
}
void loop()
{
//--------------------gives a value for each photoresistor------------------------------
int light1 = analogRead(photo1); //Read the lightlevel
int light2 = analogRead(photo2); //Read the lightlevel
int light3 = analogRead(photo3); //Read the lightlevel
int light4 = analogRead(photo4); //Read the lightlevel
int light5 = analogRead(photo5); //Read the lightlevel
//----------------------------------operates xyplane servo---------------------------------//
if (light1>light3 && light1>light5 && light1>light4 && light1>light2 && pos!=180 ){
xyplane.write(pos);
delay(100);
pos ++;
}
if (light3>light1 && light3>light5 && light3>light4 && light3>light2 && pos!= 0 ){
xyplane.write(pos);
delay(100);
pos --;
}
//-------------------------------operates zyplane servo----------------------------------------
//zyplane.attach(10);// attach the pin 10 servo to servo object
if (light2>light4 && light2>light5 && light2>light3 && light2>light1 && pos2!=180 ){
zyplane.write(pos2);
delay(100);
pos2 --;
}
if(light4>light2 && light4>light5 && light4>light1 && light4>light3 && pos2 != 0){
zyplane.write(pos2); //goes to the position
delay(100); //this gives the servo time to move
pos2 ++;
}
//---------------------------operates LED alignment indicator--------------------------------------
if (light5>light1 && light5>light2 && light5>light3 && light5>light4){
digitalWrite(ledPin, HIGH);
}
else{
digitalWrite(ledPin, LOW);
}
}